Apple’s iOS 18 brings a host of new features to the Messages app, with one of the most anticipated being the ability to schedule messages to Send Later. This feature allows users to compose an iMessage and set a specific date and time for it to be delivered. Whether you want to send a birthday greeting or plan reminders, this tool adds convenience and flexibility to your messaging experience. Let’s dive into how you can take advantage of this new feature.
What Is the Send Later Feature?
The Send Later feature is a scheduling option within the Messages app that allows you to compose an iMessage and set it to send at a future date and time. Introduced in iOS 18, this feature is especially useful for planning messages in advance and ensuring timely delivery, whether you’re managing reminders, sending birthday wishes, or organizing professional communication.
Key Requirements
Before you can start using the Send Later feature, ensure you meet the following requirements:
- iOS 18 Installed: You must have iOS 18 installed on your iPhone. This feature is available on all iPhones compatible with iOS 18.
- iMessages Only: The scheduling feature works with iMessages, not standard SMS texts. Make sure you are sending to another iPhone or an Apple device.
- Internet Connection: Since iMessages use Apple’s server, an active Wi-Fi or cellular connection is required for the message to be sent.
How to Schedule Messages in iOS 18
Scheduling messages in iOS 18 is straightforward, though the option is somewhat hidden in the app. Here’s how to do it step by step:
- Open the Messages App: Launch the Messages app on your iPhone.
- Compose a Message: Select an existing conversation or start a new one by tapping the compose icon. Write your message as you normally would.
- Access Send Later: Instead of hitting the send button right away, tap the + icon on the left side of the text field. Swipe down to find and select Send Later.
- Pick a Date and Time: A date and time picker will appear. Set the desired time for the message to be sent.
- Send the Scheduled Message: Once you’ve picked the date and time, tap the send button (up arrow) to schedule your message.
Managing Scheduled Messages
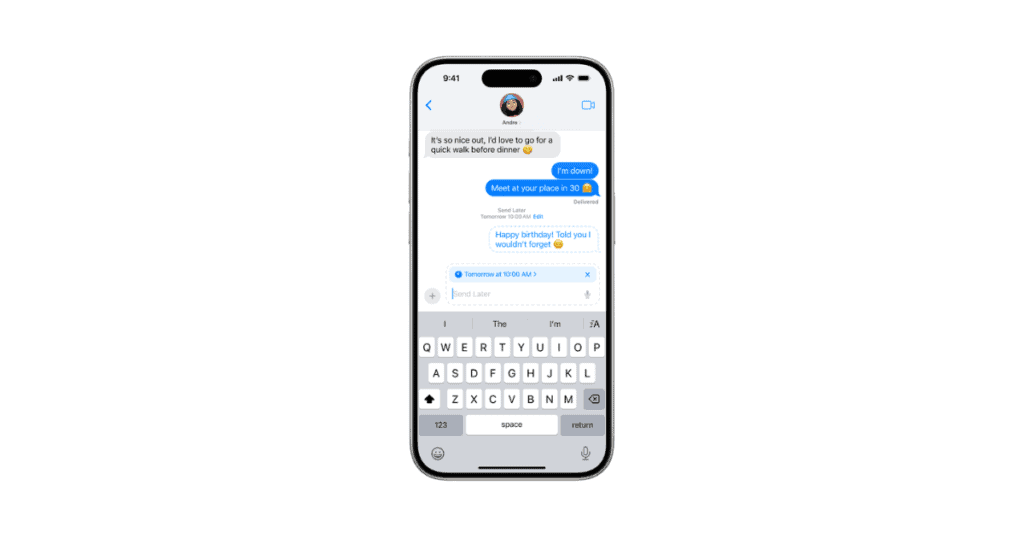
Once your message is scheduled, you can easily manage or modify it. The message will appear in the conversation with a dotted-line bubble, indicating it is queued to send later. Here’s how to manage scheduled messages:
- Edit the Scheduled Time: If you want to adjust the time, tap the Edit button next to the scheduled message. You can modify the time, send it immediately, or delete the message.
- Cancel the Scheduled Message: If you no longer want the message to be sent, simply tap Edit, and choose to delete the scheduled message.
- Use Dotted-Line Indicator: The dotted line around the scheduled message helps you identify it as a pending message that will be sent at the specified time.
Customizing Your Send Later Experience
The Send Later feature in iOS 18 allows for some customization to fit your messaging habits. Here are a few options to make the most of it:
- Reorganize Settings for Faster Access: If you use the Send Later feature frequently, you can long-press and drag it to the first page of the Messages settings menu for quicker access.
- Reminders and Alerts: Set reminders through scheduled messages to yourself or friends. This is perfect for important meetings, events, or tasks.
Common Use Cases for Scheduling Messages
Scheduling messages can be incredibly useful in various scenarios. Here are a few common examples:
- Birthday and Holiday Greetings: Plan ahead by scheduling birthday or holiday messages. You can set them days or even weeks in advance to ensure timely delivery.
- Work Reminders: Schedule reminders to coworkers or clients about meetings, deadlines, or important events.
- Personal Notes: Send yourself a reminder or motivational note at a specific time when you might need it.
Troubleshooting the Send Later Feature
While the Send Later feature is intuitive, you might encounter some issues. Here’s how to troubleshoot:
- Ensure iMessage Is Enabled: If the scheduled message isn’t working, confirm that iMessage is turned on under Settings > Messages.
- Check Wi-Fi/Cellular Connection: Make sure your iPhone has a stable internet connection when the scheduled time arrives, as iMessages require it to be sent.
- Reinstall iOS 18: If issues persist, reinstalling or updating iOS 18 may resolve bugs related to message scheduling.
Why You Should Use Send Later
The Send Later feature is a powerful addition for personal and professional use. It not only saves you time but also ensures that important messages are delivered exactly when you need them to be. Whether you’re planning a message for the future or want to automate reminders, Send Later offers a new level of flexibility in iOS 18.
Final Thoughts
The Send Later feature in iOS 18 makes the Messages app more versatile and user-friendly than ever before. By allowing you to schedule messages in advance, Apple adds a level of convenience that’s perfect for both casual users and professionals alike. With easy setup, editing, and customization, you’ll find plenty of ways to incorporate this feature into your daily routine. Whether it’s for business, personal reminders, or special occasions, scheduling messages helps ensure you never miss an important moment.